
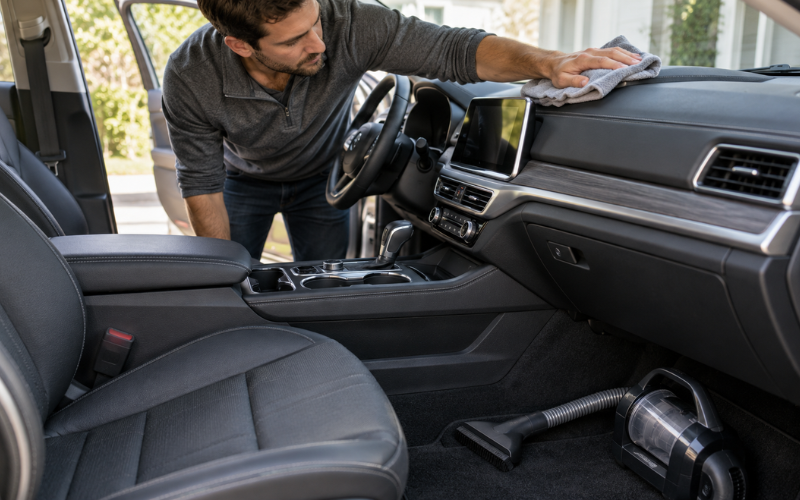
A clean car interior feels more comfortable to drive in and is easier to maintain. Cleaning it means removing dust, crumbs, stains, and odors from the surfaces you use every day, including the dashboard, seats, carpets, windows, and door panels. The process is straightforward when you work in a sensible order: clear out clutter, remove loose dirt, clean hard surfaces, treat the seats, and finish with the floors and glass.
The best method depends on what your car’s interior is made of. Fabric, leather, plastic, and touchscreens can all react differently to cleaners and too much moisture. Before you begin, check your car’s owner’s manual and the product labels. Then take your time, using the right tool for each surface.
Gather the Right Supplies for Interior Car Cleaning
You do not need a large collection of products to clean the interior of a car. A vacuum with a crevice attachment, several clean microfiber cloths, and a soft brush will handle much of the work. The vacuum lifts crumbs and dust, the brush loosens dirt in seams and vents, and microfiber helps wipe surfaces without leaving much lint behind.
Choose cleaners based on the surface you plan to treat. An automotive interior cleaner may work on some hard surfaces, but it should not be assumed safe for every material. Fabric seats may need an upholstery cleaner, while leather seats need a product labeled for leather. Use an automotive glass cleaner for windows and mirrors. If a product is not clearly intended for a particular surface, check its label or choose one that is.
Keep a small container of clean water nearby if the product instructions call for a damp cloth, along with a dry cloth for removing leftover moisture. Avoid using a cloth that has been used on tires or the exterior of the car; it may carry grit or dressing that can leave marks. For best results, keep separate cloths for glass, seats, and hard surfaces.
Always read the directions before applying a cleaner. Some products need to be wiped off quickly, while others need time to work. When you are unsure whether a product is suitable, test a small amount on a hidden spot first.
Prepare the Car Before You Start Cleaning
Park in a shaded, well-ventilated place and let the interior cool down. Hot surfaces can cause some cleaners to dry too quickly, which may leave streaks or marks. Open the doors or windows to improve airflow, especially if you will be using cleaning products inside the cabin.
Remove personal belongings, rubbish, and anything stored in the door pockets or center console. Take out the floor mats and set them aside. Emptying the car first makes it easier to reach corners and keeps small objects from getting in the way.
Next, look over the interior. Notice which areas have loose crumbs, visible stains, or marks from hands and shoes. This quick check helps you decide where to spend extra time. If you find a spill or stain, check the material and cleaner directions before treating it. Blot liquid rather than rubbing it, since rubbing can push it farther into fabric or spread it across a surface.
Clean the Dashboard, Console, and Other Hard Surfaces
Start with dust and loose dirt. Use a soft brush or vacuum attachment around air vents, seams, cup holders, and the edges of buttons. These spaces collect dust and crumbs, and wiping them first can spread dirt across the dashboard.
Apply cleaner to a microfiber cloth unless the product label gives different instructions. Wiping with a cloth gives you more control around screens, switches, and openings than spraying broadly over the dashboard. Clean the dashboard, steering wheel, center console, and door panels with gentle passes. Use a clean part of the cloth as it picks up dirt.
Be careful around screens and electronic controls. Use a cloth and product intended for those surfaces, following the vehicle manual and product instructions. Do not let liquid pool around buttons or enter gaps. If you need to loosen dirt near a seam, use a soft brush rather than a sharp object.
The steering wheel and other areas you touch often may need an extra wipe. Avoid leaving a slippery finish on the steering wheel, pedals, or gear selector; these are parts you need to grip or operate safely. Finish by checking for missed dust along the edges of the dashboard and inside the cup holders.
Vacuum Seats, Carpets, and Floor Mats
Vacuuming before wet cleaning removes much of the loose dirt that would otherwise turn into mud. Start with the seats, then move to the spaces between and under them, and finish with the carpets. Work slowly, using the crevice attachment along seat seams, around seat rails, and near the center console.
If your seats are fabric, vacuum across the surface in more than one direction to lift crumbs and dust from the weave. A soft brush can help loosen dirt, but use light pressure so you do not damage the fabric. On leather, use a suitable attachment and avoid dragging a hard nozzle over the surface.
Clean the floor mats outside the car. Shake them out, then vacuum both sides. Rubber mats can often be rinsed or wiped according to the manufacturer’s instructions. Fabric mats may need upholstery cleaner if they are stained. Let mats dry fully before returning them to the car; damp mats can leave moisture and odors inside.
For carpets, concentrate on spots where dirt gathers, such as beneath the pedals and around the footwells. If vacuuming does not remove a mark, treat it with a cleaner made for automotive carpet. Use only as much product as directed, then allow the area to dry with good airflow.
Clean Fabric and Leather Seats Safely
Before cleaning seats, identify the material. Some cars have fabric, genuine leather, synthetic leather, or a combination. If you are unsure, check the owner’s manual. A cleaner made for one kind of seat may not be suitable for another.
For fabric seats, follow the upholstery cleaner’s directions and test it on a hidden area first. Apply a small amount to a cloth or directly to the stain only if the label says to do so. Work gently from the outside of a stain toward the center to limit spreading. Avoid soaking the seat: excess water can take a long time to dry and may leave marks or an unpleasant smell.
For leather seats, remove loose dirt with a soft cloth or vacuum attachment, then use a leather cleaner approved for vehicle interiors. Wipe gently rather than scrubbing. Use a conditioner only if the car’s manual or product instructions recommend it. Hyundai’s care guidance, for example, advises using suitable mild products for leather and following the vehicle-specific care instructions.
Do not assume every stain can be removed safely at home. Ink, dye transfer, and set-in spills can be difficult to treat, and aggressive scrubbing or strong chemicals may make the mark worse. If a stain remains after a careful attempt with a suitable product, a professional detailer may be able to help.
Clean the Interior Windows and Mirrors
Interior glass can collect fingerprints, dust, and a thin film that makes it harder to see clearly. Use a clean microfiber cloth and an automotive glass cleaner that is safe for your vehicle’s windows. Spray the cleaner onto the cloth when possible, especially near the dashboard, to avoid getting product on other surfaces.
Wipe the glass in overlapping passes, then use a dry part of the cloth to buff away remaining streaks. If streaks persist, change to a clean cloth; residue from other surfaces can transfer to glass. Check the windows and mirrors from different angles and in natural light, where streaks are easier to spot.
Be gentle around window edges, sensors, and dashboard materials. Avoid letting cleaner run down onto upholstery or electronic controls. A careful final check can make a noticeable difference to visibility, particularly on the windshield.
Deal With Spills, Stains, and Interior Odors
For a fresh spill, use a clean cloth to blot up as much liquid as you can. Press gently and lift the cloth rather than rubbing back and forth. Then follow the directions for a cleaner made for the affected material. Treating a stain promptly often makes it easier to remove, but the right method still depends on whether the spill is on fabric, leather, carpet, or plastic.
Odors usually have a source. Check for food wrappers, drink spills, damp floor mats, or dirt trapped in upholstery. Clean the affected area and let it dry completely. A fragrance may cover an odor for a while, but it will not remove the material causing it.
If an odor continues after cleaning, inspect areas that may be hard to reach, such as beneath seats or in the carpet. Persistent smells can sometimes point to trapped moisture or a spill that has soaked into padding. If you cannot locate or clean the source, consider having the interior inspected and cleaned professionally.
Avoid Common Interior Car Cleaning Mistakes
One common mistake is using the same cleaner on every surface. A product that works on plastic may not be safe for leather, fabric, or screens. Check the label and the vehicle manual, and test an unfamiliar product on a hidden area.
Avoid abrasive pads, stiff brushes, and sharp tools. They can scratch plastic, damage upholstery, or mark leather. Do not pour cleaner directly onto a surface or use more product than directed, especially near electronics and switches.
Leaving seats or carpets wet can also cause problems. Use a small amount of liquid, remove excess moisture with a clean cloth, and allow the area to dry with airflow. Do not reinstall damp mats. And before driving, make sure the steering wheel, pedals, and gear selector are clean and free of slippery residue.
Keep the Car Interior Clean Between Deep Cleans
Small habits can make a full interior clean less demanding. Remove rubbish when you leave the car, shake out mats when they look dirty, and wipe fingerprints from high-touch areas with a suitable cloth. Vacuuming when crumbs and dust start to build up can also stop them from spreading around the cabin.
Your routine can depend on how you use the car. A vehicle that regularly carries children, pets, or sports equipment may need more frequent vacuuming and spot cleaning. If you often eat or drink in the car, check for spills before they dry. For leather or other special materials, follow the care schedule in the owner’s manual instead of relying on a general rule.
Conclusion
To clean the interior of a car thoroughly, clear out clutter first, remove loose dirt, and work through the surfaces in a consistent order. Use cleaners suited to the material, keep moisture under control, and give carpets and mats time to dry before using the car. A little regular attention helps prevent crumbs, stains, and odors from becoming harder to deal with.
FAQs
1. How long does it take to clean the interior of a car?
A basic clean may take about an hour, depending on the car’s size and how dirty it is. Stains, pet hair, or deep carpet cleaning can add time, especially when surfaces need to dry.
2. What should I clean first inside my car?
Remove rubbish and personal items first. Then vacuum loose dirt from the seats and floor before wiping hard surfaces and treating stains. Finish with the windows and clean, dry floor mats.
3. Can I use household cleaner inside my car?
Some household products may be unsuitable for automotive materials. Check the product label and your vehicle’s manual before use, and test unfamiliar cleaners on a hidden spot. Use products intended for the surface whenever possible.
4. How do I remove a bad smell from my car interior?
Look for the source, such as food, a spill, or a damp mat, and clean the affected area with a suitable product. Let it dry fully. Spraying fragrance over the smell may hide it temporarily without removing its cause.
5. How often should I clean my car’s interior?
The timing depends on how often you drive and who or what travels in the car. Remove rubbish and wipe obvious messes regularly, then vacuum and clean surfaces when dirt begins to build up. Follow the owner’s manual for material-specific care.