
Introduction
Learning how to use a router table can make woodworking cleaner and more consistent. The table holds a router upside down beneath a flat surface, with the cutting bit extending through an opening in the top.
With a handheld router, the wood stays still while you move the tool. At a router table, you guide the workpiece past a fixed router. This setup supports repeated cuts, edge profiles, grooves, rabbets, and pattern work.
Before your first cut, learn how the table is assembled, how the bit turns, and how the wood must be fed. Safe routing depends on a stable setup, correct settings, shallow passes, and firm control. Always read the instructions for your router, table, and bit because models vary.
Understanding the Main Parts of a Router Table
The router’s collet grips the bit shank. A height adjustment controls how far the bit rises. The fence guides straight work and controls how much of the cutter reaches the wood. Its faces normally form one straight guide.
Many tables also have a miter slot for a gauge, sled, or featherboard. A dust port collects chips, a guard covers the bit, and an accessible switch lets you stop the router quickly.
Choosing the Right Router Bit for the Job
Choose a bit that matches the cut. Edge-forming bits create roundovers, bevels, and beads. Straight and spiral bits cut grooves and slots. Rabbeting bits form a step, while flush-trim and pattern bits follow a template or bring surfaces level.
Joinery and raised-panel bits are more specialized. Large cutters may require a powerful compatible router, lower speed, and several light passes. Beginners should gain experience with smaller bits first.
The shank must match the collet, and the cutter must clear the insert opening. Follow all speed and size limits. Do not use a bit that is dull, cracked, bent, badly chipped, or covered with resin.
Preparing the Router Table and Work Area
Place the table on a firm, level surface. Clear away tools, cords, offcuts, and dust. Leave room and provide support on both sides for long boards.
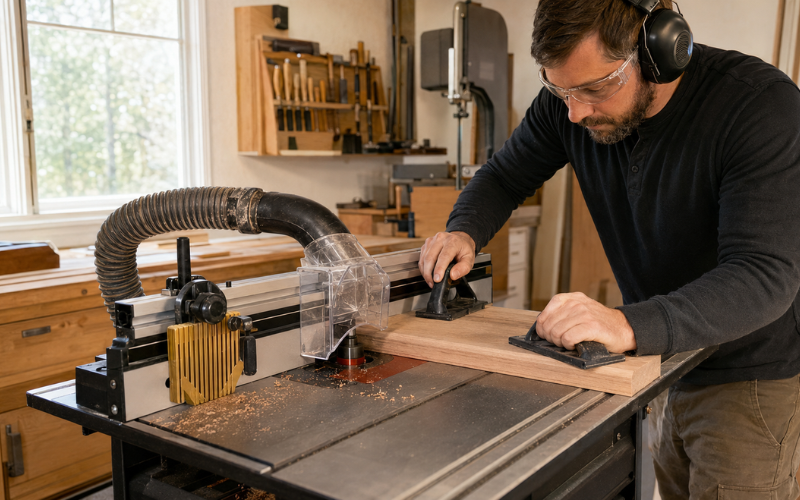
Connect dust collection without obstructing the work. Wear eye and hearing protection and suitable respiratory protection when needed. Tie back long hair, remove jewelry, and keep loose clothing and gloves away from the bit.
Mounting the Router and Installing the Bit
Use a router and plate that are compatible with the table, and tighten every clamp and fastener. Official Bosch router-table safety instructions say to disconnect power before installation, accessory changes, adjustments, or maintenance.
With power disconnected, insert the clean shank into the correct collet. Do not leave too little shank inside or force it against the bottom. Position it as directed, then tighten the collet with the proper wrench.
Setting the Bit Height and Router Speed
Set the bit to the required depth or profile with a ruler, setup block, or sample. Lock the height adjustment before cutting.
Follow the bit maker’s speed guidance. Large-diameter bits generally run more slowly, but the correct setting depends on the cutter and router. Divide heavy cuts into shallow passes for better control and a smoother result.
Aligning and Adjusting the Fence
Position the fence so the correct part of the bit is exposed. For normal edge routing, keep the bit within the fence opening. Bring the faces close to the cutter without touching it, then check alignment with a straightedge.
Lock every fence control and check bit clearance with power disconnected. Never trap the workpiece between the fence and bit during edge routing.
Making a Test Cut Before Routing the Final Piece
Test the setup on scrap matching the final piece in type and thickness. Switch off the router and wait for the bit to stop before inspecting the cut.
Check the profile, depth, and edge. Burning may indicate slow feeding, excess speed, or a dull bit. Tear-out can come from difficult grain, a deep cut, or poor support. Disconnect power before adjusting and testing again.
Feeding Wood Through a Router Table Correctly
For ordinary fence-guided work across the table’s front, feed wood from right to left. This works against the cutter’s rotation and helps hold the stock toward the fence. Both Bosch and Kreg specify this direction.
Keep the workpiece flat and firmly against the fence. Apply steady pressure without rushing or stopping beside the bit. Pausing can cause burns, while moving too quickly can produce a rough cut.
Feeding with the rotation is a climb cut. The bit can grab and pull the wood suddenly, causing kickback or lost control. Beginners should avoid it and follow model-specific instructions for unusual setups.
Using Push Blocks, Featherboards, and Guides
Push blocks and sticks keep hands away from the cutter. Use them for narrow, short, or awkward stock. They should grip the wood while maintaining pressure against the table and fence.
Featherboards help hold a consistent path. Position them as instructed so they guide uncut stock without pressing the cut section toward the bit. Support long pieces at tabletop height.
Basic Router Table Techniques for Beginners
A roundover or bevel is a good first profile. Use the fence and light passes. Straight bits make grooves and slots, while a rabbeting bit forms a step that can accept a panel or another board.
For pattern routing and flush trimming, a bearing follows a template or reference edge. Stops, templates, and jigs improve repeated cuts, provided they cannot trap the wood against the cutter.
End grain can tear at the corner. A backer board supports the fibers, and routing end grain before long edges lets later cuts clean up small damage. Light passes are easier to control.
Routing Small, Narrow, or Irregular Workpieces
Do not hold small parts close to an exposed bit. Secure them to a larger carrier or use a proper jig, sled, or template that keeps fingers away.
For bearing-guided curves, begin against a starter pin and away from the bit, then pivot carefully until the bearing meets the edge. Choose another method if a small, weak, or irregular piece cannot be controlled with a suitable jig.
Preventing Tear-Out, Burning, and Rough Cuts
Clean results require a sharp bit, suitable speed, steady feed, and modest cutting depth. Do not force the stock or pause against the cutter.
On difficult grain, take lighter passes and support the fibers with a backer board. Keep the table and fence clean. If marks remain, inspect the bit and speed before testing again.
Common Router Table Mistakes to Avoid
Common errors include wrong-way feeding, deep first passes, skipped test cuts, and routing pieces that cannot be controlled. Never adjust a connected machine or operate with a loose bit, mount, guard, or fence.
Never reach across a moving cutter, remove scraps before it stops, or start with wood touching the bit. Stand outside the likely kickback path. If anything sounds or feels unusual, stop and disconnect the machine before checking it.
Cleaning and Maintaining the Router Table
After use, disconnect power and remove dust from the table, fence, insert area, and router vents. Clean resin as the bit maker recommends. Inspect the collet, hardware, plate, guard, switch, and cord.
Store bits separately so their edges cannot strike each other. Replace damaged cutters and sharpen or replace dull ones. A clean, secure table is easier to adjust accurately.
A Simple First Router Table Practice Project
Choose a straight scrap board that is easy to control. Install a roundover bit, set a shallow height, align the fence, and check safety and clearance. Test the profile on matching scrap.
Start with the wood clear of the bit. At full speed, guide the board right to left, flat and against the fence. Move smoothly, switch off, and wait for a complete stop. Inspect the edge and make another light pass if needed.
Conclusion
Understanding how to use a router table begins with careful setup, the correct bit, secure adjustments, and a safe feed direction. Test every setting on scrap, remove wood in shallow passes, and use guides that keep the workpiece controlled. With patient practice and close attention to the manufacturer’s instructions, a router table can produce clean, accurate edges and repeatable cuts.
FAQs
1. Is a router table suitable for a beginner?
Yes, provided the beginner reads the manuals, starts with a simple operation, and uses suitable guards and work-holding aids. A basic edge profile on a stable scrap board is a better first task than a deep groove, tiny part, or large raised-panel cut.
2. Which direction should wood travel across a router table?
For normal fence-guided routing across the front of the table, move the wood from right to left. This feeds the workpiece against the bit’s rotation. A different setup can change the required direction, so always check the instructions for the exact operation.
3. Can any router be mounted in a router table?
No. The router must be suitable for table use and compatible with the insert plate or mounting system. The table must also support the router’s size and weight. Check both manufacturers’ compatibility information before installation.
4. Do I need a variable-speed router for table use?
Variable speed is especially useful when working with bits of different diameters. Larger bits commonly need lower speeds. If the router has one fixed speed, use only bits that are approved for that speed and follow all size limits.
5. Can I use a router table without its fence?
Yes, but only for suitable controlled operations, such as routing a curve with a bearing-guided bit, starter pin, guard, and secure template or jig. Do not remove the fence simply to guide an unsupported workpiece freehand around the bit.