
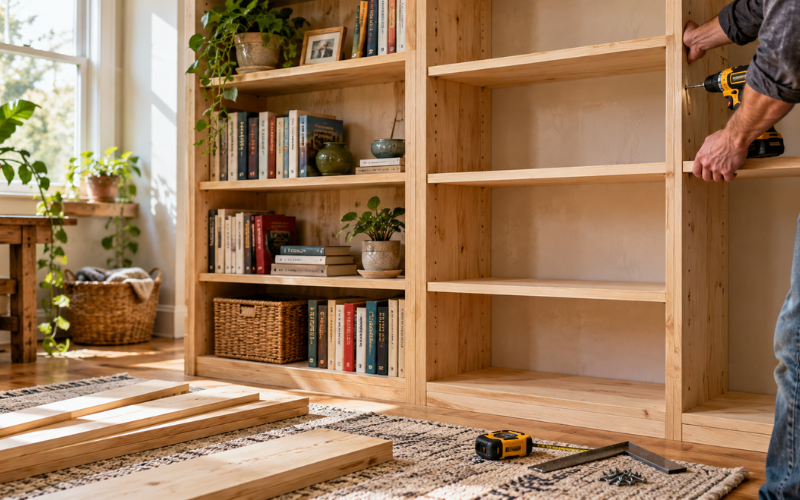
A bookshelf can be as simple as a few shelves held between two side panels or as detailed as a full-height bookcase with a back and adjustable shelves. Either way, building one starts with a clear plan. You’ll need to measure the space, choose materials that suit the design, and decide how the shelves will be joined to the frame.
This guide walks through the process of how to build a bookshelf, from planning and cutting the pieces to assembly, finishing, and securing it in place. The right dimensions and construction method depend on where the bookshelf will stand, what it needs to hold, and the tools you have available. If you’re new to woodworking, a small freestanding bookcase with fixed shelves is a manageable first project.
Choose a Bookshelf Design and Plan the Dimensions
Start by choosing a style that suits both your room and your experience. A freestanding bookshelf is a practical choice if you want a complete unit that can sit against a wall. A wall-mounted bookshelf can save floor space, but it needs a secure attachment to the wall and careful planning around the wall structure. A simple bookcase with two sides, a top, a bottom, and a few shelves is often the easiest version to build.
Measure the place where you want the bookshelf to go. Record its available height, width, and depth, and leave enough room for skirting boards, doors, nearby furniture, or anything else that could get in the way. Think about how you’ll use the shelves. Paperbacks need less depth than large art books or storage boxes, while a shelf for heavy reference books may need stronger support than one for a few light items.
Make a basic sketch and write down the dimensions of every piece. Include the thickness of your chosen wood or sheet material in your calculations. For example, the overall width of a bookcase is not just the inside space between the sides: the two side panels also take up room. A quick sketch helps you catch that before you cut anything.
Decide whether you want fixed or adjustable shelves. Fixed shelves are straightforward to position and fasten. Adjustable shelves offer more flexibility, but they need a way to support each shelf, such as shelf pins fitted into accurately drilled holes. For a first build, fixed shelves keep the work simpler.
Gather Materials, Tools, and Safety Gear
Common bookshelf materials include plywood, solid wood, screws, and wood glue. Plywood is made from layers of wood and can be useful for a sturdy, stable bookcase. Solid wood offers a natural grain and can be finished in several ways. Both options can work well, but the suitable thickness and support depend on the shelf’s length and the weight it will carry. Choose material based on your plan rather than assuming every board will suit every design.
You’ll also need measuring and marking tools, a drill or screwdriver, clamps, and a way to cut the panels. A saw can be useful if you’re comfortable using one, but many timber suppliers and home improvement stores can cut sheet material to your measurements. That can make the project easier if you don’t have the right equipment or a suitable place to cut.
For a basic finish, gather sandpaper, paint or wood stain, and a brush or cloth, depending on the product instructions. Safety glasses are important when cutting or drilling. Use a dust mask when sanding, and keep loose clothing, jewelry, and long hair away from moving tools. Read the instructions for the specific tool you’re using, secure the wood before cutting, and don’t remove safety guards. OSHA’s woodworking safety guidance emphasizes eye and face protection and proper safeguards around saws.
Measure and Cut the Bookshelf Pieces
Mark out the sides, top, bottom, and shelves using your sketch. Use a tape measure and a straightedge to draw clear cut lines, then check each measurement once more before cutting. When two pieces need to match, mark them from the same reference point so they’re less likely to end up slightly different.
If you’re cutting the material yourself, work on a stable surface and support the piece on both sides of the cut. Follow the saw’s instructions, keep your hands away from the blade, and allow the tool to stop before setting it down. If you’re unsure about making a cut safely, have the material cut by a supplier or ask an experienced person to help.
After cutting, compare the matching pieces and check that the edges are even. Small differences can make a bookshelf difficult to assemble squarely. Sand rough edges lightly so they’re smoother to handle and ready for assembly. Don’t sand away so much material that you change the fit.
Lay all the cut pieces together in the order they’ll be assembled. This simple dry fit can reveal a mislabeled panel or a dimension that needs attention before you start fastening parts together.
Assemble the Frame and Install the Shelves
Begin by joining one side panel to the top and bottom, then attach the other side to form the frame. Depending on the design and material, you may use screws, wood glue, or both. Pre-drilling holes can help reduce the chance of splitting, especially near the ends of solid wood pieces. Use fasteners suited to the material and long enough to hold securely without coming through the opposite face.
Clamps can help hold pieces in position while you work, but don’t rely on them to correct a frame that is out of alignment. Check the corners and measurements as you assemble. The frame should sit squarely, with both side panels upright and the top and bottom level. If it shifts during fastening, loosen or adjust it before moving on.
Mark the planned shelf positions on both side panels. Measure from the same edge on each side so that each shelf sits level. Set the shelves in place and attach them with the chosen fasteners. Follow your plan for the shelf depth and leave enough room for the intended books to fit.
A simple bookshelf can look finished at this stage, but don’t rush to load it. Check that the joints feel secure and that the shelves sit evenly. If a shelf seems loose, correct the connection before adding the back panel or applying a finish.
Add a Back Panel for Support
A back panel can help keep a bookshelf square and reduce side-to-side movement. It may be made from a thinner sheet material than the shelves and frame, as long as it suits the design. Measure it to fit the back of the assembled frame, then attach it carefully so it doesn’t pull the bookshelf out of shape.
Before fastening the panel, check that the bookshelf is square. Measure across the frame from one corner to the opposite corner, then compare the measurement with the other diagonal. If the two measurements differ, gently adjust the frame until they are closer. Attach the panel while keeping the frame aligned.
An open-back bookshelf won’t have this panel, so plan another way to help it remain steady. The sides and shelves need to be firmly joined, and a tall unit may need additional bracing or wall attachment. The best choice depends on the design and where the bookshelf will be used. If you’re unsure whether your structure is sturdy enough, get advice before loading it.
Sand, Finish, and Let the Bookshelf Dry
Sand visible surfaces and rough edges until they feel smooth. Start with a grit suited to the condition of the material, then use a finer sandpaper for the final pass if needed. Remove sanding dust before painting or staining; leftover dust can make the surface look uneven.
Choose a finish that suits the material and the look you want. Paint can add color and cover differences in the wood. Stain brings out the grain, while a clear finish offers a more natural appearance. Some materials, including certain plywood surfaces, may need a primer or a different finishing approach. Check the product label to see how it should be applied and whether it’s suitable for your material.
Apply the finish in a ventilated area and follow its drying instructions. More than one coat may be needed, depending on the product and the result you want. Let each coat dry as directed before applying another, and let the bookshelf dry fully before bringing it into use. Rushing this step can leave surfaces tacky or make the finish easier to mark.
Place and Secure the Bookshelf Safely
Set the finished bookshelf on a stable, level surface. If the floor is uneven, adjust the placement or use a suitable method to stop the unit from rocking. Before loading it, make sure it’s steady and that the shelves are firmly attached.
A tall or top-heavy bookshelf can tip if someone pulls on it or climbs on a shelf. The U.S. Consumer Product Safety Commission advises anchoring bookcases and other furniture securely to a wall to reduce tip-over risks. Choose an anti-tip device and fasteners suitable for the bookshelf and wall, follow the kit instructions, and attach it to an appropriate part of the wall structure. If you’re uncertain what type of fastener your wall needs, ask a qualified professional.
When loading the bookshelf, place heavier books on lower shelves and spread weight across each shelf. Avoid putting more weight on the unit than its materials and construction can support. If a shelf starts to bow, creak, or loosen, remove some of the load and inspect the supports.
Common Bookshelf-Building Mistakes to Avoid
One common mistake is cutting pieces before checking the measurements and the plan. A small error in the side panels or shelf depth can create problems throughout the build. Double-check the dimensions, account for the thickness of the material, and label each piece before cutting.
Another is assembling the frame without checking that it is square. If the frame is twisted, the shelves may not sit level and the bookshelf may wobble. Check the corners as you work and make adjustments before the glue or fasteners are fully set.
Shelf sag is another problem to plan for. A long shelf carrying heavy books needs enough support for its length and load. Rather than relying on a single general rule, choose a suitable material and design, and add a support or divider if the shelf span seems too long for the load.
Finally, don’t skip wall anchoring for a tall or top-heavy bookshelf, or load it before its finish has dried. These last steps are easy to overlook when the main construction is complete, but they help make the bookshelf safer and more durable in everyday use.
Conclusion
Learning how to build a bookshelf is easier when you break the job into a few clear stages: plan the design, measure carefully, cut and assemble the pieces, then finish and secure the unit. A simple freestanding bookcase can be a practical first project, especially if you take your time checking the fit and keeping the frame square.
Before you load the shelves, inspect the joints, confirm that the bookshelf sits steadily, and anchor it appropriately if its height or position calls for it. Thoughtful measurements and careful assembly will help you end up with a bookshelf that fits your space and serves its purpose.
FAQs
1. What is the easiest type of bookshelf to build?
A small freestanding bookshelf with two sides, a top, a bottom, and fixed shelves is a straightforward design for beginners. It uses fewer parts than adjustable or wall-mounted versions.
2. What wood is best for building a bookshelf?
Plywood and solid wood are both common choices. The best option depends on the design, appearance, tools, and weight the shelves need to hold. Choose a material suited to the planned dimensions and load.
3. Do I need a back panel for a bookshelf?
A back panel can help keep a bookshelf square and steady. If you want an open-back design, the frame may need other support, particularly if the bookshelf is tall.
4. How do I keep bookshelf shelves from sagging?
Use a material and shelf design suited to the shelf’s length and expected load. For a long shelf holding heavy books, consider adding a center support or divider.
5. Should I anchor a bookshelf to the wall?
Tall or top-heavy bookshelves should be secured to reduce the risk of tipping. Use an anti-tip device and fasteners suitable for the bookshelf and wall, and follow the installation instructions.